Install MongoDB on Linux on Azure
发布于 2015-09-14 15:24:36 | 209 次阅读 | 评论: 0 | 来源: 网络整理
In this tutorial, you will learn to deploy a MongoDB replica set to CentOS VMs on Windows Azure and access it from outside Azure. The following are the tasks to achieve this:
- Sign up for “Virtual Machines and Virtual Networks” preview feature. See Sign Up for Azure.
- Set Up Affinity Group
- Create and Set Up the Virtual Machines
- Install and Run MongoDB
- Configure the Replica Set
Set Up Affinity Group
The affinity group needs to be set up from the old portal.
If in the new Azure Management preview portal, click your user name in the top right of the screen, then “Previous Portal” to switch to the old portal.

Once in the old portal, click “Hosted Services, Storage Accounts & CDN”
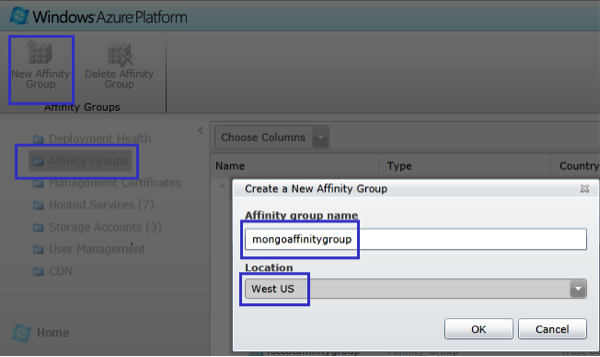
Select “Affinity Groups” and then “New Affinity Group”
In the “Create a New Affinity Group” dialog, enter an affinity group name such as “mongoaffinitygroup” and choose a location. Choose one of the newer Azure data centers such as “West US,” “East US” or “West Europe.”
Create and Set Up the Virtual Machines
To create a 3-node MongoDB replica set you will be creating 3 VM instances. For this step, log in to the new preview portal, or from the old portal, click “Visit the Previous Portal” at the bottom of the page
Create Instances
Instance 1
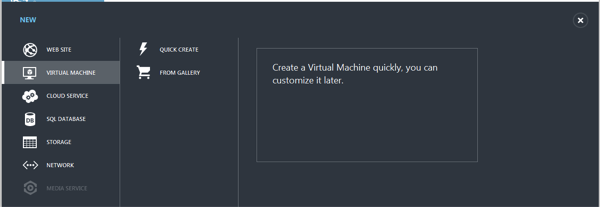
In the portal, click New->Virtual Machine->From Gallery
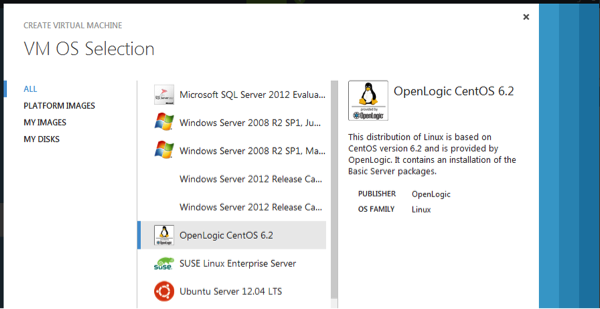
On the VM OS Selection page, choose “OpenLogic CentOS 6.2” and click the next arrow to continue
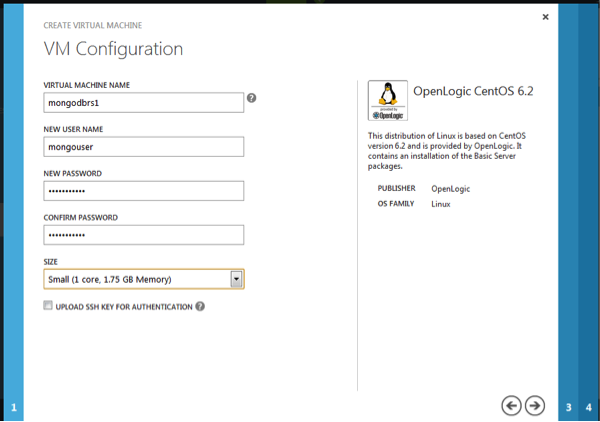
On the VM Configuration page, specify values for the parameters
- Virtual Machine Name - “mongodbrs1”
- New User Name – “mongouser.” This user will be added to the “sudoers” list file
- New Password box – type a strong password that conforms to the Azure specifications
- Retype the password to confirm
- Size – Choose appropriate size from drop down list. For anything but small test instances, choose a size larger than Medium
- Leave “Upload SSH key for Authentication” unchecked
Click the next arrow to continue
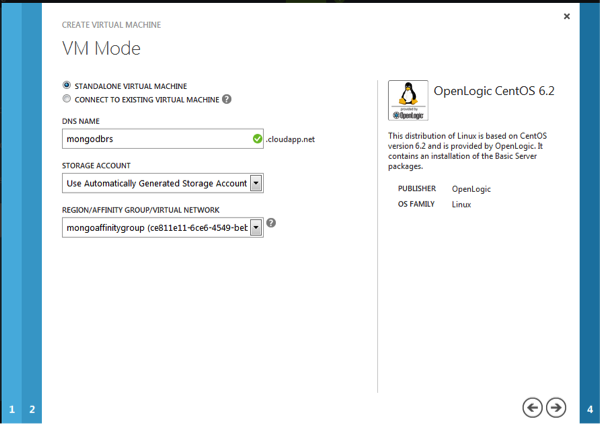
On the VM Mode page, specify values for the required parameters
- Select “Standalone Virtual Machine”
- DNS – a valid DNS prefix e.g., “mongodbrs”
- Storage Account box – choose “Use Automatically Generated Storage Account”
- In the “Region/Affinity Group/Virtual Network” box, select the affinity group created previously “mongoaffinitygroup”
Click next arrow to continue
On the VM Options page select “None for Availability Set”
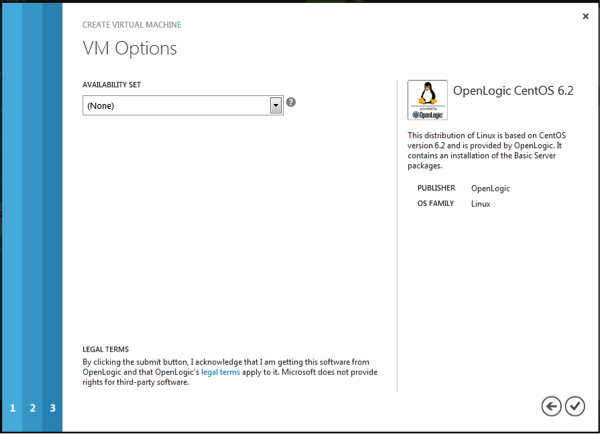
Click the check mark to create the VM instance
Instance 2
A similar process to creating instance 1.
In the portal, click New->Virtual Machine->From Gallery
On the VM OS Selection page, choose “OpenLogic CentOS 6.2” and click the next arrow to continue
On the VM Configuration page, specify values for the parameters
- Virtual Machine Name - “mongodbrs2”
- New User Name – “mongouser.” This user will be added to the “sudoers” list file
- New Password box – type a strong password that conforms to the Azure specifications
- Retype the password to confirm
- Size – Choose the same size as instance 1
- Leave “Upload SSH key for Authentication” unchecked
Click the next arrow to continue
On the VM Mode page, specify values for the required parameters
- Select “Connect to Existing Virtual Machine”
- In the dropdown choose the host created in instance 1, in this case “mongodbrs1”
- Storage Account box – choose “Use Automatically Generated Storage Account”
- The “Region/Affinity Group/Virtual Network” box should be automatically set to “mongoaffinitygroup”
Click next arrow to continue

On the VM Options page select “None for Availability Set”
Click the check mark to create the VM instance
Instance 3
A similar process for creating instance 2. Choose “mongodbrs3” to be the Virtual Machine Name in step 3.
Configure Endpoints
Once the virtual machines are connected you need to configure the endpoints to:
- Allow remote connection
- Allow MongoDB traffic
Instance 1
In the management portal, click virtual machines and click the name of instance 1, “mongodbrs1”
Now click on endpoints
The ssh endpoint should be automatically created. For this endpoint ensure the following are set
- Protocol – tcp
- Public Port – 22
- Private Port – 22
- Load Balanced – No
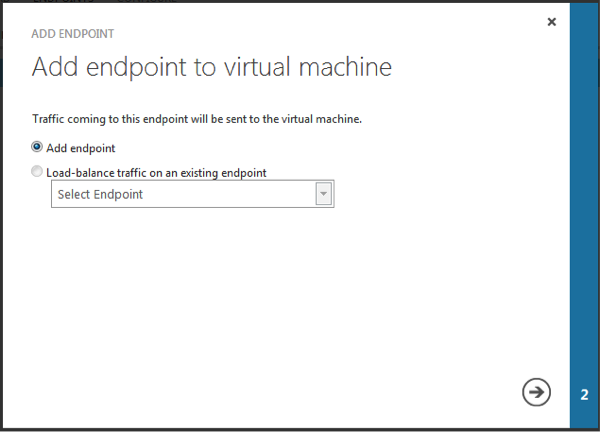
Create a new endpoint for MongoDB by clicking on “Add Endpoint” at the bottom of the screen
Ensure “Add endpoint” is selected and click the right arrow to go to the next screen
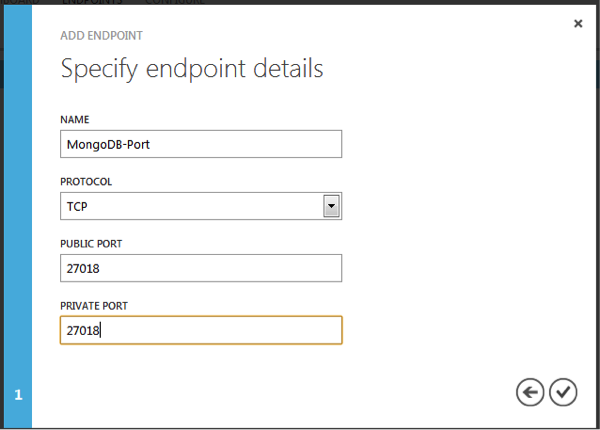
Specify the endpoint details as below:
Name : MongoDB-Port
Protocol : TCP
Public Port : 27018
Private Port : 27018
Click on check mark to create endpoint
The instance now should have 2 endpoints, 1 for SSH and 1 for MongoDB

Instance 2
We need to configure the endpoints for instance 2 similar to instance 1:
In the management portal, click “virtual machines” and click the name of instance 2
Now click on “endpoints”
The ssh endpoint should be automatically created. Ensure that:
- Name – SSH
- Protocol – TCP
- Private Port – 22
- Load Balanced – No
Now click on Edit Endpoint at the bottom of the screen and set “Public Port” to 23. Click on the “check mark” to update
Create a new endpoint for MongoDB by clicking on “Add Endpoint” at the bottom of the screen
Ensure “Add Endpoint” is selected and click the right arrow to go to the next screen
Specify the endpoint details as below:
- Name : MongoDB-Port
- Protocol : TCP
- Public Port : 27019
- Private Port : 27019
- Click on check mark to create endpoint
The instance now should have 2 endpoints, 1 for SSH and 1 for MongoDB

Instance 3
Create endpoints for instance 3 similar to instance 2 with the following changes:
- In step 4, set public port to 24
- In step 7, set public and private ports to be 27020
The instance now should have 2 endpoints, 1 for SSH and 1 for MongoDB

Update OS
Use this optional step to update the operating system on each of your VM instances. Once the machine endpoints have been configured above, you need to log into the machines to update them. More information on this can be found at How to Log on to a Virtual Machine Running Linux.
Use the username and password you used when creating the virtual machine instances.
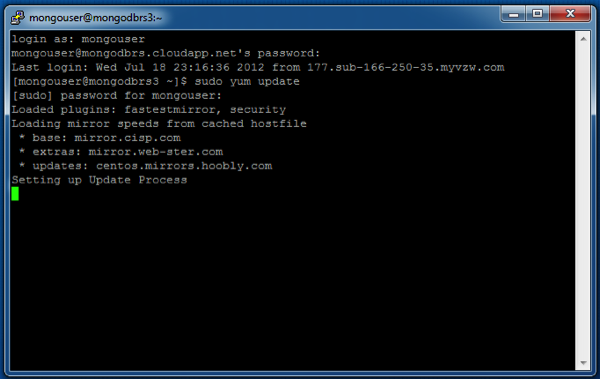
Once you are connected to the machine, update the operating system by running: sudo yum update and following the prompts. This could take some time.
When connecting to instances 2 and 3, remember to use ports 23 and 24 and not the default ssh port of 22.
Set up Disks
Once the instances are updated, you can then attach a data disk to each of the instances. The data disks will be storing the actual MongoDB data as part of --dbpath. More information on Azure data disks can be found at Data Disk Concepts.
To set up the data disk follow the steps outlined below for each of the instances you created:
- Attach an empty disk of at least 10 GB to the instance as described in How to: Attach an empty disk <http://www.windowsazure.com/en-us/manage/windows/how-to-guides/attach-a-disk/#attachempty>.
- Initialize the data disk by following the steps described at How to: Initialize a new data disk in Linux.
- Also once mounted, create a data directory by:
- Log on onto the instance
- Then run sudo chown `id -u` /mnt/datadrive/ to make the mongouser the owner of the data directory
- Run the following command: mkdir -p /mnt/datadrive/data
Install and Run MongoDB
As part of this step, you will be using the official 10gen-supplied packages to install, configure and run MongoDB as a service using YUM. You want to install as a service since this would ensure that mongod is started on machine restart also. For more information see :manual: Install MongoDB on RedHat Enterprise, CentOS, or Fedora </tutorial/install-mongodb-on-redhat-centos-or-fedora-linux/>.
Install MongoDB
Repeat the following steps on each instance:
Log onto the instance
Create an /etc/yum.repos.d/10gen.repo file to hold information about your repository using your favorite editor as sudo. Place the following configuration in /etc/yum.repos.d/10gen.repo file:
[10gen]
name=10gen Repository
baseurl=http://downloads-distro.mongodb.org/repo/redhat/os/x86_64
gpgcheck=0
enabled=1
After saving the new .repo file, issue the following command to update the local package database: sudo yum update
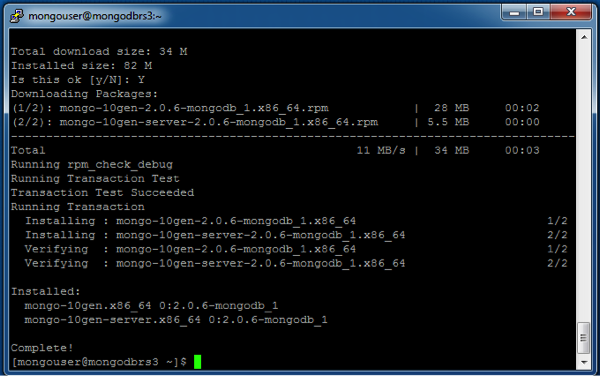
Issue the following command (as root or with sudo) to install the latest stable version of MongoDB and the associated tools:
sudo yum install mongo-10gen mongo-10gen-server
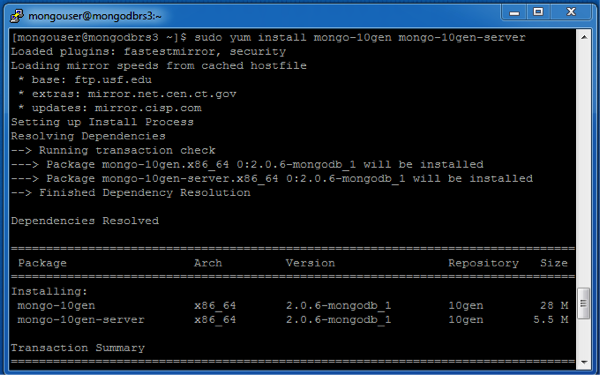
When this command completes, you have successfully installed MongoDB.
Configure MongoDB
The packages installed in the previous step configure MongoDB using the /etc/mongod.conf file in conjunction with the control script. You can find the init script at /etc/rc.d/init.d/mongod. As part of this step you will edit the mongod.conf file to set the appropriate parameters. If the parameters are commented, make sure to uncomment them.
Instance 1
Connect to the instance using ssh or PuTTY
As sudo, edit /etc/mongod.conf to set the following parameters:
port = 27018
dbpath = /mnt/datadrive/data
logpath = /mnt/datadrive/mongod.log
replSet = mongors
Save the config file
Instance 2
Connect to the instance using ssh or PuTTY, remembering the SSH port for this node has been changed from the default of 22
As sudo, edit /etc/mongod.conf to set the following parameter:
port = 27019
dbpath = /mnt/datadrive/data
logpath = /mnt/datadrive/mongod.log
replSet = mongors
Save the config file
Instance 3
Connect to the instance using ssh or PuTTY, remembering the SSH port for this node has been changed from the default of 22
As sudo, edit /etc/mongod.conf to set the following parameter:
port = 27020
dbpath = /mnt/datadrive/data
logpath = /mnt/datadrive/mongod.log
replSet = mongors
Save the config file
Start MongoDB
Once the configuration files have been edited, start the database process mongod on each instance by:
Log on onto the instance
Run the following command to start the process:
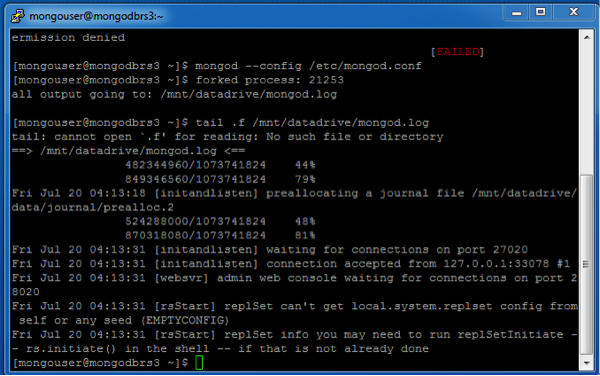
mongod --config /etc/mongod.conf
This should start the mongod process
Verify that mongod start by tailing the log file using the command
tail --f /mnt/datadrive/mongod.log
The “waiting for connections” message in the log file indicates mongod is up and running and waiting for client connections. This may take a while as mongod preallocates its journal files
Configure the Replica Set
At this point in time, you should have mongod running on all 3 of your instances. You can now configure the 3 instances as a replica set by connecting to 1 of the 3 instances from within Azure or from outside.
Connect to the running mongod process using the mongo shell:
If connected to the VM instance type the following command where port is 27018 for instance 1, 27019 for instance 2 and 27020 for instance 3:
mongo --port <port number>
If connecting to the mongod process in Azure from your local machine use the following command:
mongo --host mongodbrs.cloudapp.net --port <port number>
In the mongo shell type the following:
> conf = {
   _id = “mongors”,
   members : [
     {_id:0, host:”mongodbrs.cloudapp.net:27018},
     {_id:1, host:”mongodbrs.cloudapp.net:27019},
     {_id:2, host:”mongodbrs.cloudapp.net:27020}]}
> rs.initiate(conf)
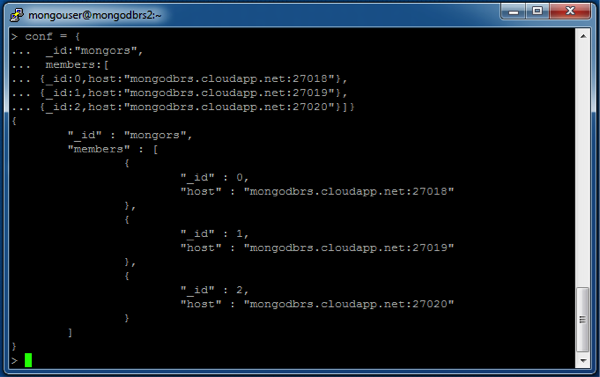
This will start the initialization of the mongodb replica set
Type the command rs.status() to check the status of the replica set. Upon successful initialization, you should see 1 of the 3 instances being the “Primary” of the set and the other 2 being the “Secondaries”
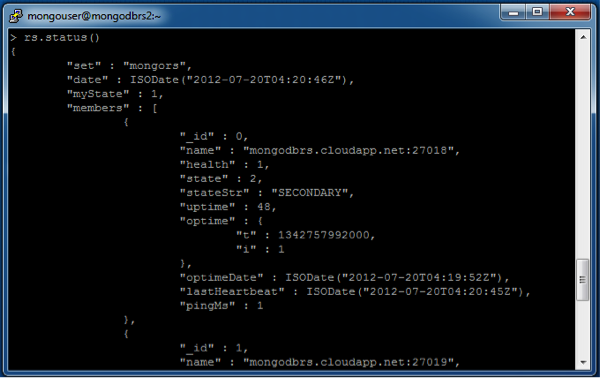
You have now successfully initiated the replica set
Summary
In this tutorial you have learned how to create a set of CentOS virtual machines on Windows Azure, deploy MongoDB to them and create a replica set out of them. You can access this set from anywhere using the connection string
mongodb://mongodbrs.cloudapp.net:27018, .cloudapp.net:27019, .cloudapp.net:27020/?replicaSet=mongors"