发布于 2016-04-25 12:57:59 | 296 次阅读 | 评论: 0 | 来源: 分享
这里有新鲜出炉的精品教程,程序狗速度看过来!
PyQt python GUI工具包
PyQt是一个创建GUI应用程序的工具包。它是Python编程语言和Qt库的成功融合。Qt库是目前最强大的库之一。PyQt是由Phil Thompson 开发。 PyQt实现了一个Python模块集。它有超过300类,将近6000个函数和方法。
有许多人使用 Python 来写图形化界面时选择了 PyQT,但是有许多人不知道如何将开发好的程序打包成为安装包,这篇文章我就来介绍一种非常简单的也是非常基础的在 MAC 下打包 PyQT 程序的方法。
安装 PyQT
安装 QT
我们首先要安装 QT,我这里安装的是, QT 5.5,对于 MAC 上 QT 的安装直接到官方网站上去找到对应的安装包下载安装即可。
http://www.qt.io/
安装 SIP
对于 SIP,我们也需要到官方网站去下载对应的 MAC 的源码包,安装过程如下:
| |
python configure.py
sudo make
sudo make install
|
如果该过程中出现了 Operation not permitted 的报错信息,解决方案详见:解决 Mac OS X 10.11 安装 sip 没有权限的问题
安装 PyQT
我们需要到官方网站上去下载 PyQT5 的源码包,编译安装:
| |
python configure.pysudo
make
sudo make install
|
需要注意的是,在 make 的过程中可能需要我们在参数中加入 QT5 的 bin 目录和 SIP 的安装目录。
安装 PyInstaller
在终端中执行:
| |
sudo pip install pyinstaller
|
这样就安装完成了打包所需要的工具
写一个 PyQT 程序
下面我们来写一个简单的 PyQT 程序:
| |
import sysfrom PyQt5.QtWidgets
import QApplication, QWidget
if __name__ == '__main__':
    app = QApplication(sys.argv)
    w = QWidget()
    w.resize(250, 150)
    w.move(300, 300)
    w.setWindowTitle('Simple')
    w.show()
    sys.exit(app.exec_())
|
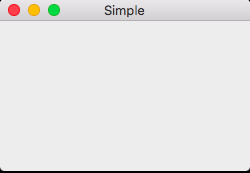
执行之后:
我们会看到一个 QT 程序:

将 PyQT 程序 打包
下面我们就将上面写的程序进行打包,成为 .app 文件
我们需要先对程序的入口文件运行一次打包程序(对于我的Demo就是 testqt.py):
| |
pyinstaller --windowed --onefile --clean --noconfirm testqt.py
|
我们查看下目录有什么变化:
| |
$ tree
.
├── build
│   └── testqt
│       ├── out00-Analysis.toc
│       ├── out00-BUNDLE.toc
│       ├── out00-EXE.toc
│       ├── out00-PKG.pkg
│       ├── out00-PKG.toc
│       ├── out00-PYZ.pyz
│       ├── out00-PYZ.toc
│       └── warntestqt.txt
├── dist
│   ├── testqt
│   └── testqt.app
│       └── Contents
│           ├── Frameworks
│           ├── Info.plist
│           ├── MacOS
│           │   └── testqt
│           └── Resources
│               └── icon-windowed.icns
├── testqt.py
└── testqt.spec

8 directories, 14 files
|
打开自动生成的 testqt.spec,这就是一个配置文件:
| |
<span class="line"><span class="comment"># -*- mode: python -*-</span></span>

<span class="line">block_cipher = <span class="keyword">None</span></span>


<span class="line">a = Analysis([<span class="string">'testqt.py'</span>],</span>
<span class="line">             pathex=[<span class="string">'/Users/jason/Project/Python/PyQt'</span>],</span>
<span class="line">             binaries=<span class="keyword">None</span>,</span>
<span class="line">             datas=<span class="keyword">None</span>,</span>
<span class="line">             hiddenimports=[],</span>
<span class="line">             hookspath=[],</span>
<span class="line">             runtime_hooks=[],</span>
<span class="line">             excludes=[],</span>
<span class="line">             win_no_prefer_redirects=<span class="keyword">False</span>,</span>
<span class="line">             win_private_assemblies=<span class="keyword">False</span>,</span>
<span class="line">             cipher=block_cipher)</span>
<span class="line">pyz = PYZ(a.pure, a.zipped_data,</span>
<span class="line">             cipher=block_cipher)</span>
<span class="line">exe = EXE(pyz,</span>
<span class="line">          a.scripts,</span>
<span class="line">          a.binaries,</span>
<span class="line">          a.zipfiles,</span>
<span class="line">          a.datas,</span>
<span class="line">          name=<span class="string">'testqt'</span>,</span>
<span class="line">          debug=<span class="keyword">False</span>,</span>
<span class="line">          strip=<span class="keyword">False</span>,</span>
<span class="line">          upx=<span class="keyword">True</span>,</span>
<span class="line">          console=<span class="keyword">False</span> )</span>
<span class="line">app = BUNDLE(exe,</span>
<span class="line">             name=<span class="string">'testqt.app'</span>,</span>
<span class="line">             icon=<span class="keyword">None</span>,</span>
<span class="line">             bundle_identifier=<span class="keyword">None</span>)</span>
|
我们可以修改它来打包更复杂的程序,具体参考 PyInstaller 官方文档
下面就剩下最后一步我们就能将其打包成为 .app 文件了:
| |
pyinstaller --clean --noconfirm --windowed --onefile testqt.spec
|
我们可以看到在 dist 目录下多了一个 testqt.app,这就是我们打包完成的程序包,双击,可以正常运行。
